
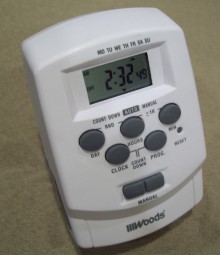
Early model Woods® Dual Outlet Digital Timer Instructions
Before programming the timer, adjust the feeder’s internal feed timer as directed in its operating manual by plugging the power adapter cord into the feeder and the power adapter directly into a power outlet. Use the small plastic screwdriver supplied to turn the little white dial located under the lateral rubber plug to control the feed cycle time for desired portion size.
1. First, charge timer’s internal battery for at least 1 hour before use.
2. Push the small recessed “reset” switch with a paperclip or similar item until you see all 88:88
3. Press and hold the “clock” button down, push the “day” button repeatedly until you point the cursor at the top of the window to the current day of week.
4. While holding “clock” button down, push the “hour” button repeatedly until you have the correct hour and AM or PM in the window.
5. While holding “clock” button down, push the “minute” button repeatedly until you have the correct minute(s) in the window.
6. Release the “clock” button.
To program feed cycles at the same time(s) all 7 days of the week:
1. Push the “program” button once and you should see a “1” (first feed cycle) AM or PM and “ON” in the window
2. Push the “day” button once and you should have all 7 cursors at the top of the window under all 7 days of the week and have “AM” and “ON” in the window.
3. Push “hour” button repeatedly until you have the desired hour and AM or PM in the window you want your first feed cycle to occur. You will be programming the “OFF” time the same way.
4. Push “minute” button repeatedly until you have the minutes set for the time you want the feeder to turn on. You will be programming the “OFF” time the same way.
5. Push the “program” button one more time and you should see a “1” (first feed cycle) AM or PM and “OFF” to program your off time.
6. Repeat steps 3 and 4 to program “OFF” time 2 minutes later than “ON” time you previously selected. Example: 5:00 AM “ON” and 5:02 AM “OFF” This will be your first feeding time.
7. Repeat above sequence for additional feed cycles up to 8 times per day making sure that you have at least 2 minutes of “off” time between subsequent programmed feed times. Example: You may feed twice in as little time span as 5 minutes. We recommend feeding small portions several times per day.
8. When done, push the clock button and then cycle the “manual” button until you have the cursor at the bottom of the window facing “AUTO” and “OFF” (NOT flashing “ON!!”) for automatic mode. Make sure there is no blue or green power light in the feeder with the timer in the auto-off mode (automatic mode).
1. with no blue or green power light in the feeder.
Note: You may turn on your feeder manually by pushing the “manual” button until you have the cursor at the bottom of the window facing “manual” and flashing “on” in the window, but make sure you return it to “auto” and “off” for automatic operation with no power light illuminated in the feeder.
Note: For additional information, review the manufacturer’s operating manual.
Woods® Brand 50009 ACDT-36 Dual Outlets Digital Timer Instructions for Super Feeder Operation
Before programming any timer, you must first adjust the feeder’s internal feed timer as directed in its operating manual by plugging the power adapter cord into the feeder and the power adapter directly into a power outlet. Use the small plastic screwdriver to do that.
1. First, insert timer in outlet to charge timer’s internal battery for at least 1 hour before use.
2. Lightly push the small recessed “reset” switch (R) with a paperclip or similar item until you see all 88:88
3. Press and hold the “CLOCK” button down, push the “DAY” button repeatedly until you see the current day of week at the top of the display.
4. While holding “CLOCK” button down, push the “HOUR” button repeatedly until you have the correct hour and AM or PM set in the display.
5. While holding “CLOCK” button down, push the “MINUTE” button repeatedly until you have the correct minute in the display.
6. You may push and hold any minute, hour or day button to speed up process. Release the “CLOCK” button when done.
To program same feed cycle(s) at the same daily time(s) all 7 days of the week:
1. Push the “PROG” button (program) once and release. You should see a “1” (first feed cycle) and “ON” below the 1 in the window
2. Push the “DAY” button until you see all 7 days of the week or days selected to come on and have “AM” in the window.
3. Push “HOUR” button repeatedly until you have the desired hour and AM or PM in the window you want your first feed cycle to occur.
4. Push “MINUTE” button repeatedly until you have the minutes set for the time you want the feeder to turn on.
5. Push the “PROG” button one more time and you should see a “1” (first feed cycle) and “OFF” below the 1 to program your off time.
6. Repeat steps 2, 3 and 4 to program “OFF” time 2 minutes later than “ON” time you previously selected. Example: 5:00 AM “ON” and 5:02 AM “OFF” This will be your first feeding time.
7. Repeat sequences above for additional feed cycles up to 20 times per day making sure that you have at least 2 minutes of “off” time between subsequent programmed feed times. Example: You may feed twice in as little time span as 5 minutes. We recommend feeding small portions several times per day. You may double-check all programs by repeatedly pushing the "PROG" button making sure that all other on-off programs have dash lines in the display--NO NUMBERS!
8. Push and release the "CLOCK" button, and then cycle the "ON-OFF" button until you have “AUTO” in the display for automatic mode.
9. Now plug the feeder's power adapter into the timer and the timer into an outlet. Note: You may manually activate your feeder with the timer by selecting it to "ON" mode and then returning it to "AUTO" when feed cycle is completed. Make sure you return it to “AUTO” for automatic operation with no power light illuminated in the feeder. You may review the manufacturer's instructions for additional timer information. Super-Feed warranty on timers is for a duration of 90 days from purchase date. Any other timer can be used.
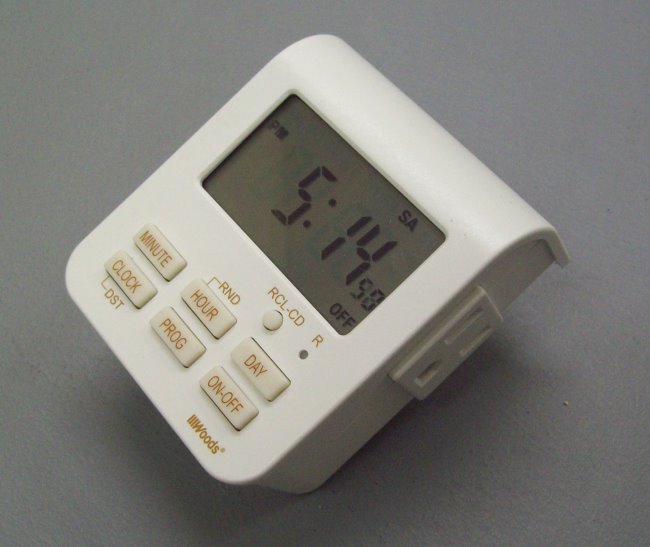
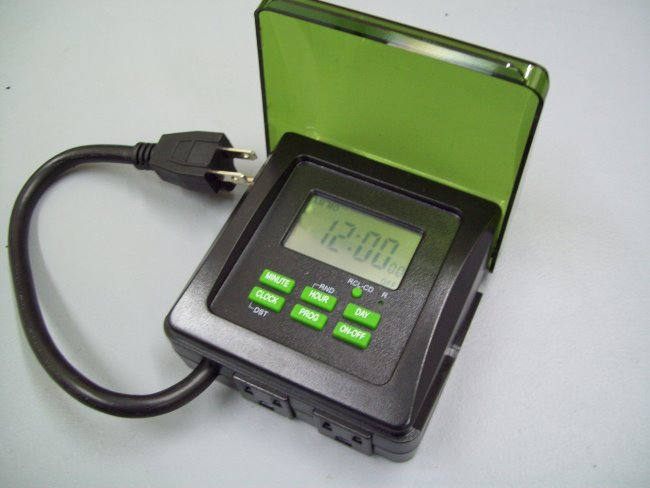
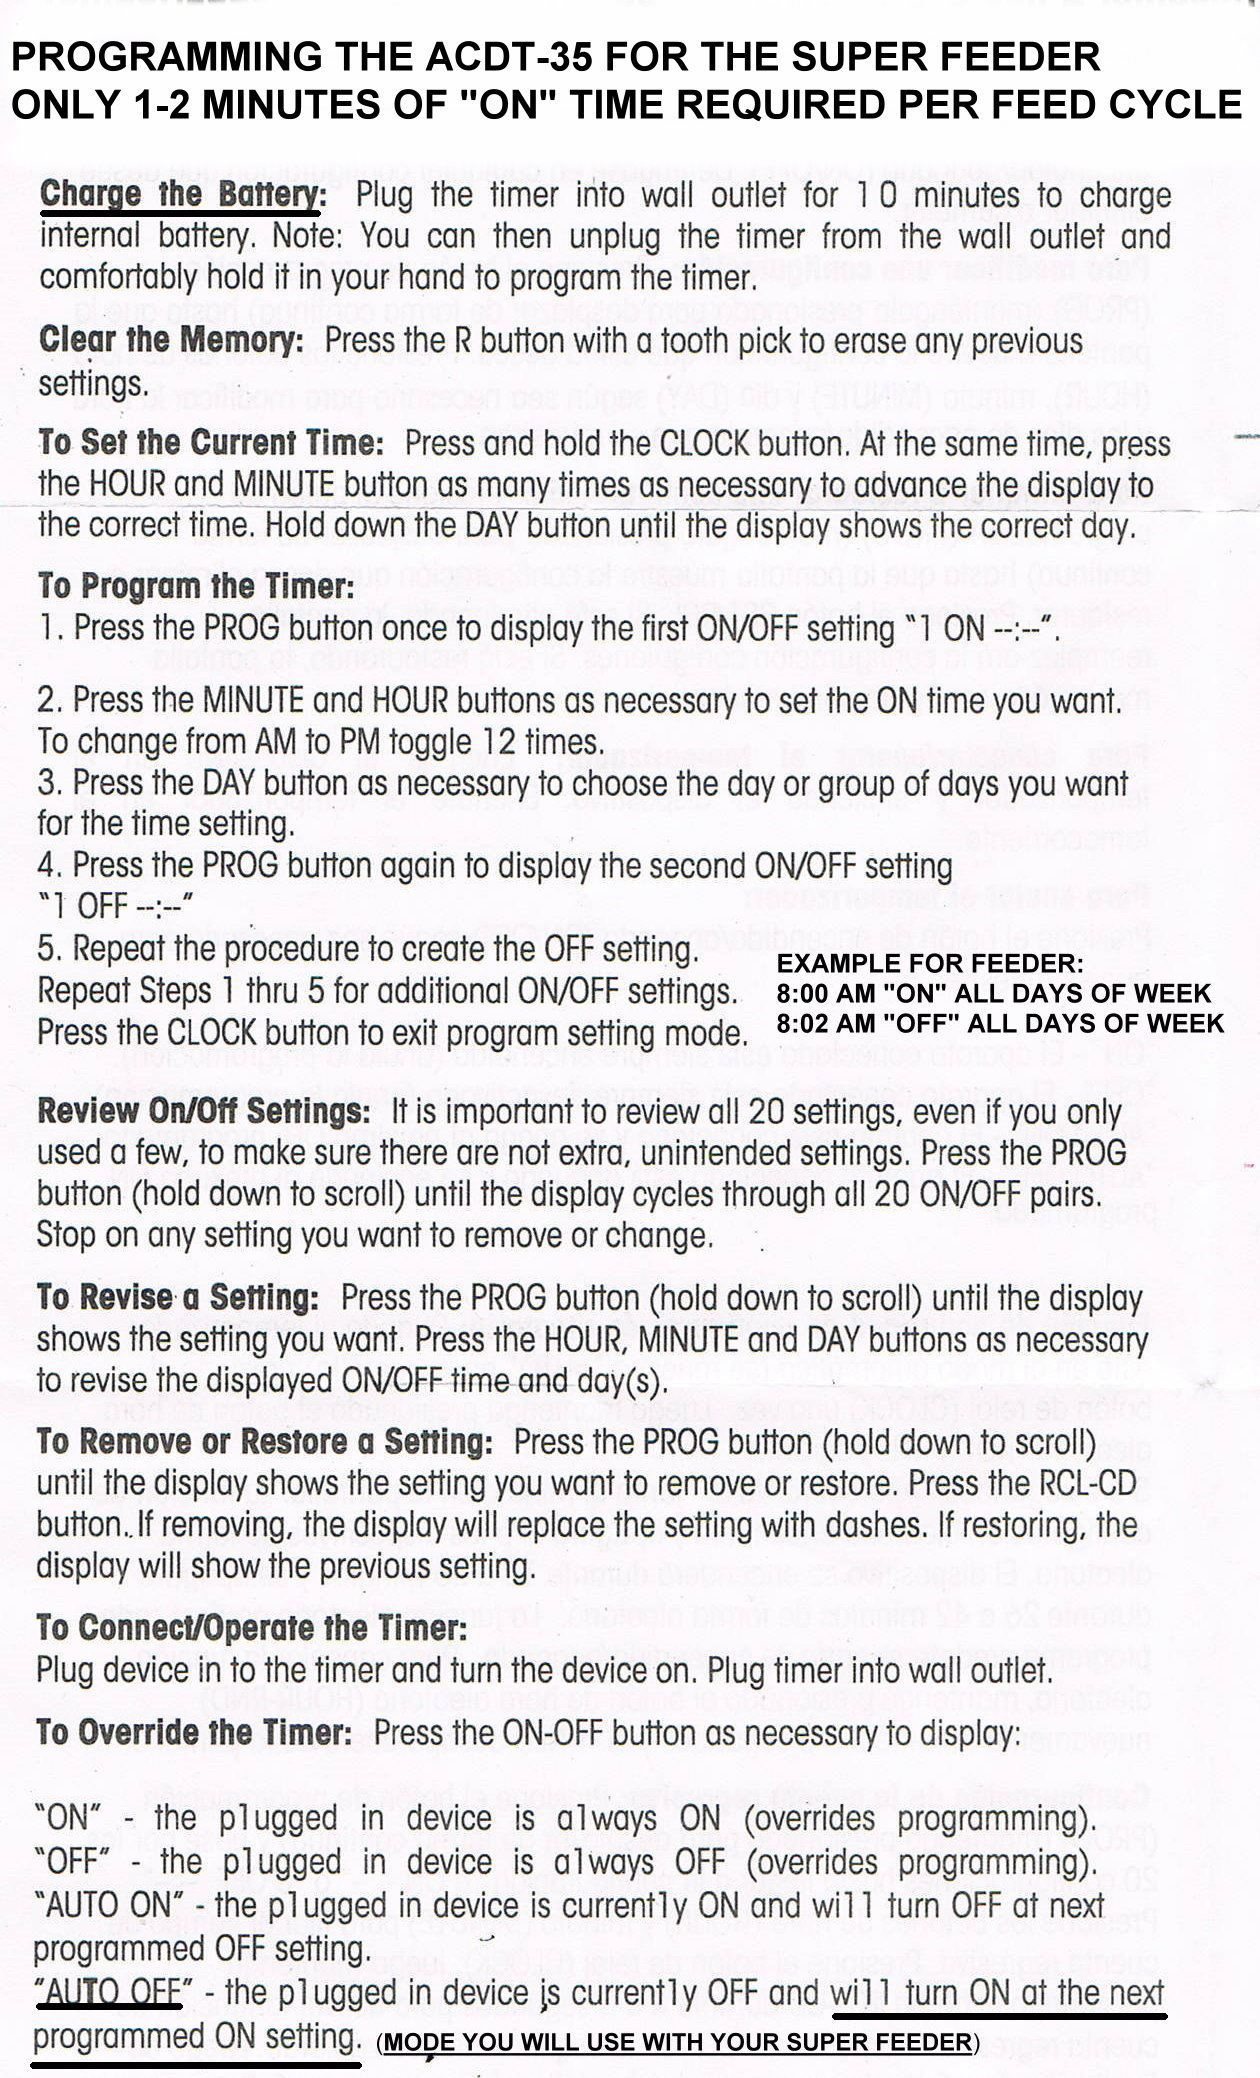
Woods® Brand 50015 ACDT-35 Dual Outlets Outdoor Digital Timer Instructions for Super Feeder Operation
ACDT-20 (ETU-63A manufacturer's number) Digital Timer Programming